July 14, 2018

First Aid Kit: How to Make One


First Aid Kit: How to make one #BePrepared
by Millcreek Canyon Camps
Friday, April 20, 2018

Source: Facebook Post by Millcreek Canyon Camps

We love the Boy Scout motto: Be Prepared. As adult leaders, we’re responsible to teach Cub Scouts how to be responsible for not only themselves, but those around them. One of the best ways to begin teaching this is by helping Cubs create their own first aid kit and then teaching them how to safely use it. We’ve put together a simple and cost-effective way to create a portable kit because every child should come to camp prepared. We’ll give you a step by step process of what you need for a kit as well as some fun suggestions to help get your Cubs even more excited to make them. Here’s what you’ll need:

Resealable Sandwich Bag


Resealable sandwich bags are the perfect size to fit a variety of supplies for a first aid kit.

Resealable sandwich bags work so well with a portable first aid kit. They allow different sized objects to fit into them depending on the activity you are participating in. They will keep first aid supplies clean and dry. And most importantly, they can be easily replaced. Add Color! While it’s fine to simply write your pack number of the bags, we recommend that you invite your Cubs to color their bags using different colored Sharpie markers. Have them draw their favorite animal, a campsite, or any other crazy thing that may pop into their head. This will get them excited to not only have a first aid kit, but to also fill it and use it.

Bandages


While there are many different types of bandages, my favorite for summer camp are the "Flexible Fabric". They allow for great breathablity on cuts & scrapes.

There are so many different sizes to choose from when it comes to bandages! Each pack should decide what size of bandages depending on the activities you’ll be participating in. I personally prefer using fabric bandages for most activities and cuts. Decorate! While it’s fun to buy character bandages, they’re pricey. Try adding stickers to them so that each Cub chooses what kind of fun bandage they want to use. Remember to only remove the outer wrapper. The bandage will not be sterile if the white underside covers are removed.

Alcohol Swabs


While bandages are important in keeping a wound clean, alcohol swabs are what actually clean the affected area.But let’s be honest, alcohol on any sort of wound isn’t fun. There are alternatives that will clean cuts just as good as alcohol but don’t cause that burning sensation. One in particular is called benzalkonium chloride. This does come as a swab, but sometimes can be a little more expensive than alcohol swabs.

Cotton Swabs


Cotton swabs are able to clean better than the alcohol swabs depending on the type of wound.

Cotton swabs are great for many things. Sometimes it can be difficult to completely clean cuts & scrapes, but a cotton swab can really help when wetted down by an antiseptic (i.e. alcohol) or even just water. Secondly, cotton swabs are great for applying bacitracin or Neosporin.Keep ‘em Clean! Wrap cotton swabs in plastic wrap to protect them from being dirty by the other items in your first aid kit.

Bacitracin


Neosporin is an alternative, but be sure to check that the person isn't allergic to either before applying to the affected area.

As mentioned before, alcohol swabs are for cleaning out wounds. Bacitracin will continue to wounds after the alcohol has dried up. This will be the most expensive part of the kit and so we recommend that you purchase 1 tube for the entire pack. We recommend that you apply this with cotton swabs.

Gloves


One box of gloves will be more than enough for your first aid kits. Hold on to the extras for other activities like first aid practices.

Gloves are great to have when performing first aid. While it’s nice to have them, they are certainly not required to protect yourself and a wounded Cub Scout from spreading disease or pathogens. By simply being cautious in how you handle the different swabs & bandages and everything will be just fine.

Remember that if you come prepared, there will be less worry and stress, especially if all of your Cubs have the tools to handle those small abrasions or, as we like to call them, stories. Now you are #BePrepared.


June 28, 2018

Principles and Guidelines for Scouting through 2019


Principles and Guidelines for Boy Scout and Cub Scout Units until December 31, 2019

On December 31, 2019, the Church will officially stop sponsoring Scouting units. Until that time, leaders should, under the direction of the bishopric, continue to use the Boy Scout and Cub Scout programs to help support the purposes of the Aaronic Priesthood and Primary (see Handbook 2: Administering the Church [2010], 8.1.3, 11.1). The following principles and guidelines can help.

Principles (see also http://aptraining.lds.org)

  • Purposes of activities: Activities should “fulfill gospel-centered purposes” ( Handbook 2, 13.1). They should help boys and young men build relationships, give service, have fun, learn practical skills, build confidence, and prepare for their divine roles. They are more likely to learn these lessons from experiences rather than classroom settings.
  • Balance: Activities should provide a balance of opportunities to develop spiritually, socially, physically, and intellectually (see Luke 2:52; Handbook 2, 8.13.1; 13.2.6).
  • Planning: Activities for young men should be planned in advance and executed by Aaronic Priesthood quorum and troop leaders, with support from adult advisers (see Handbook 2, 8.13). Activities for boys should be planned and executed by Primary and Cub leaders.

Guidelines

  • Continue to register young men and boys ages 8–13 and adult leaders with the Boy Scouts of America (BSA).
  • Consult with parents of boys and young men to determine how to best support their goals in Scouting.
  • Use Scouting resources—such as merit badges, boards of review, and courts of honor—to accomplish the purposes of Church activities as described above


June 3, 2018

Ask the Expert: What is (and What isn’t) a Camping Night for the Camping Merit Badge?


Source: https://blog.scoutingmagazine.org/2015/06/24/ask-expert-isnt-camping-night-camping-mb/


When it comes to finding a place to spend the night, Boy Scouts have seemingly limitless options: tent, hammock, cabin, retired battleship, museum, church gymnasium, baseball stadium, sleeping bag under the stars.

All of these locations offer a great experience for Scouts, but only some count as camping — at least when it comes to the Camping merit badge.

Camping merit badge requirement 9a says:
Camp a total of at least 20 nights at designated Scouting activities or events.* One long-term camping experience of up to six consecutive nights may be applied toward this requirement. Sleep each night under the sky or in a tent you have pitched. If the camp provides a tent that has already been pitched, you need not pitch your own tent.

*All campouts since becoming a Boy Scout or Varsity Scout may count toward this requirement.
So just what is (and what isn’t) a camping night? Let’s ask the expert. 

The question

I have recently become advancement chairperson of a small troop. I am getting pressured to record an overnighter that took place in the meeting place (in a church youth room) and also an indoor aquarium museum sleepover towards the boy’s camping nights.

I don’t believe this fits the requirement for camping: “Under the stars or in a tent you have pitched …”

It’s been a hard sell. Could you please clarify what is and is not considered “camping”?

Thanks,
Christina

The expert’s response

This comes from Michael LoVecchio of the BSA’s Member Experience Innovation Team.

“The intent of the requirement is to camp overnight in a tent or under the stars,” LoVecchio says. “This means sleeping overnight in building/structure does not meet the intent of the requirement.”

More explanation

Still unclear? Here’s more:

“Camp a total of 20 nights …”

This means 20 overnights, so a weekend trip from Friday through Sunday is two nights. Complete 10 such trips, and you’ve got the 20 you need.

All campouts since becoming a Boy Scout or Varsity Scout may count toward this requirement. In other words, a Scout doesn’t need a blue card for the Camping MB before he may begin counting these nights. Any nights as a Boy Scout or Varsity Scout are eligible.

“… at designated Scouting activities or events.”

This means the experiences are held under the auspices of some level of the BSA, and that “Scouting” happens on them.

For example, an individual family or a couple of Scouts and their parents heading off into the woods doesn’t count.

“One long-term camping experience of up to six consecutive nights may be applied toward this requirement.”

  • A long-term camping experience is at least five consecutive nights. The long-term camping experience must also be a “designated Scouting activity or event.” This could be at a council summer camp or on a troop’s own 50 miler, a Jamboree, high-adventure base, etc.
  • Only one of these experiences is allowed, and up to six nights may count toward the requirement. Example: A trip that lasts Sunday through Saturday counts as six nights.
  • If a Scout goes on a 10-night trek or a 20-night trek or a 100-night trek (!), only six of those nights will count.
  • If a Scout goes to summer camp twice for a total of 12 nights, only one of the summer camps will count — for up to six nights.
  • The remainder of the camping nights must be accumulated through short-term camping — normally weekend troop campouts.
  • Example 1: A Scout goes to summer camp for six nights. He can count all of those nights and now needs 14 more nights. These 14 nights must come from short-term camping experiences — probably seven two-night weekend campouts.
  • Example 2: A Scout goes on a 10-night Philmont trek. He can count six of those nights and now needs 14 more nights.These 14 nights must come from short-term camping experiences — probably seven two-night weekend campouts.
  • Example 3: A Scout can’t make it to summer camp or a high-adventure base. Over the course of three years he attends 10 two-night troop campouts, sleeping in a tent each time. After the 20th night he has completed the requirement.

“Sleep each night under the sky or in a tent you have pitched.”

  • All 20 nights must be spent under the sky or in a tent, so nights in cabins don’t count.
  • If camping is done at a camp that provides tents that are already set up, then all is good. If tents are not already pitched, the Scout must pitch his tent. If he is sleeping in a two-man tent, then it would be reasonable the he and his buddy set the tent up together. Sleeping in a tent that Dad or the Scoutmaster, etc., pitched doesn’t count.

A final thought

Some parents have Scouts in troops that don’t do very much camping. They can get in the long-term outing, but it takes a long time for their troop to get out on enough campouts to make up the other 14 nights.

As a workaround they suggest they will send their son to summer camp, but then take him home after four nights so the experience will not count as a long-term camp. This doesn’t fulfill the requirement.


Short-term campouts provide variety in both preparation and experience, and the Scouts are more likely to have to set up their own tent and take more responsibility for outdoor living skills. A long-term summer camp is still a long-term camp even if the Scout is there for only a portion of the time. It’s an entirely different adventure and usually doesn’t call for the same level of self-reliance required for a short term camp.


May 10, 2018

Boy Scouts of America Organization Is Not Changing Their Name


According to Scouting Wire, the Boy Scouts of America organization is not changing their name. Just the sub program "Boy Scouts" ages 11-17 is changing to "Scouts BSA".  Individual troops will still be all Boys, or now or all Girls.


May 8, 2018

LDS Church Leaving Boy Scouts of America


May 8th, 2018:  Today the LDS Church announced the official split with Boy Scouts of America will occur next year, December 2019.  Scouts will continue to run as usual until then.


April 16, 2017

Service Activity


In a few weeks we will be having a service activity, and we are looking for service opportunities.  If you have any small service projects that would take about 10-30 minutes to complete, let us know.  Our activity runs from 7pm to about 8:30pm, in the evening, so outside services would work as long as they are in well lit locations.  We will also be passing around a sign up sheet on Sunday.

Possible services ideas would include taking out someone's garbage, sweeping their floor, vacuuming someone's family room, reading to their children, leaving notes of kindness on windshields of random vehicles, singing a hymn to a family, sharing a scripture with a family, washing someone's windows , etc.

The activity will be in the form of a scavenger hunt, and the various teams will be competing against each other.  It will work something like this:

https://drive.google.com/file/d/0B8FYvwSWihMnYm9YMnRHU2hTOWM/view


Aviation Open House at Airport #2


Aviation Open House

BBQ Fundraiser for aviation student organizations


Time: Saturday, April 22, 2017 from 9:00 am to 1:00 pm
Location: South Valley Regional Airport (Aiport #2)
Address: 7586 S. Airport Road (4470 West)


Explore educational and Job Opportunities

  • Pilots
  • Mechanics
  • FAA
  • Airport Operations
  • Flight Attendants
  • Military Careers
  • Aerospace Engineers
  • National Weather Service

Boy Scout Aviation Merit Badge


February 7, 2017

EDGE Method


The EDGE method is a four step method for teaching a skill:
  • Explain
  • Demonstrate
  • Guide
  • Enable

Explain

First explain what you will be doing. Tell them the steps involved. Visual aids might be helpful for this step. Use questions to gauge their understanding.

Demonstrate

Show them how to do the skill. Demonstrate the steps using the actual materials. Describe what you are doing.


Guide

Let them practice the skill. Guide and coach them as they try to do it themselves. This step will take the most time.


Enable

Enable them by letting them do the skill themselves without any intervention.

Example of Teaching EDGE Exercise

An exercise with paper airplanes to help the participants understand teaching EDGE:
  • Explain: Explain how they would make a paper airplane.
  • Demonstrate: Get out a piece of paper and show them how to make the paper airplane.
  • Guide: Give each of them a piece of paper and described each step, and have them do it with their pieces of paper.
  • Enable: Give them each another piece of paper and tell them to make a paper airplane on their own.

January 22, 2017

Scout Outdoor Essentials


THE SCOUT OUTDOOR ESSENTIALS

They’re called “essentials” for a reason. Every packing list starts with these 10 items.

1. A pocketknife or multitool can be handy in a wide variety of situations. It’s useful for tasks as large as building an emergency shelter or lighting a campfire with poor fuel, or as small as repairing a damaged backpack. Keep you knife sharp and clean, and don’t forget to first earn your Whittling Chip (for older Cub Scouts) or Totin’ Chip (for Boy Scouts).

2. A first-aid kit can be a lifesaver. Literally. A few items will allow you to treat scratches, blisters and other minor injuries. They should also allow you to provide initial care while waiting for help for more serious injuries.

3. Bring extra clothing to match the weather. Multiple layers are better than a single massive jacket, because layered clothing is adaptable to a wide range of temperatures.

4. Rain gear is very important. Rain can come in a hurry, and getting your clothes drenched is more than just uncomfortable, it can lead to hypothermia, a potentially fatal condition.

5. A flashlight, headlamp or a rugged penlight is important for finding your way in the dark. Bring extra batteries, too.

6. Trail food is good for maintaining your energy. Bring more than you think you’ll need in case you get stuck (or lost) in the woods.

7. Water can prevent dehydration, heat exhaustion and heatstroke. Use a lightweight, unbreakable container with a secure lid.

8. Matches and/or a fire starter may be used to light fires for heat, or for signaling for help. Store matches or lighters in resealable plastic bags.

9. Sun protection might include sunblock, sunglasses, lip balm and a wide-brimmed hat.

10. A map and compass are probably the most important tools you can carry in case you get lost.

KEEPING CLEAN

Here are some hygiene items you may want to pack, depending on the outing:
  • Toothbrush
  • Toothpaste
  • Dental floss
  • Soap
  • Comb
  • Waterless hand cleaner
  • Small towel
  • Washcloth
  • Toilet paper
  • Trowel for digging cathole latrines

COOKING AND EATING

Here are some cooking and eating items you may want to pack, depending on the outing:
  • Large plastic cereal bowl or kitchen storage bowl
  • Spoon
  • Cup or insulated mug
  • Water treatment system
  • Backpacking stove with fuel
  • Large pot and lid (2.5- or 3-quart size)
  • Small pot and lid (1.5- or 2-quart size)
  • Lightweight frying pan (10 to 12 inches in diameter)
  • For melting snow, add 1 large pot and lid (6 to 10 quarts)
  • Hot-pot tongs

EXTRAS

Here are some extras you may want to pack, depending on the outing:
  • Watch
  • Camera
  • Notebook
  • Pen or pencil
  • Sunglasses
  • Small musical instrument
  • Swimsuit
  • Gloves
  • Whistle
  • Nylon cord
  • Insect repellent
  • Repair kit
  • Hiking stick or trekking poles
  • Binoculars
  • Fishing gear
  • Animal identification books, plant keys, geological studies, star charts or other guides


January 21, 2017

Winter Camping Equipment List


Winter Camping Equipment List


Note on Uniforms: When participating in the Klondike Derby or other winter camping events, Scouts must wear their class A uniform when departing on the trip and during the competition.  Event organizers have been known to check on this.  

Note on Clothing:  Scouts should dress in layers to keep warm; this includes socks.  Layers of clothing next to the skin must be changed at least daily (socks twice daily) because sweat makes them wet, and boys with wet clothing can quickly get chilled.  Cotton is not appropriate for underclothing, socks, and shirts because when wet it provides no insulation at all.  All clothing (and all personal gear) should be labeled with boy’s name.    

As always, Scouts should pack their own gear (with parental supervision) so they know what they have and where everything is.  Here is a checklist for a winter weekend camping trip.  

  • Class A Uniform (including at least shirt, neckerchief & slide; hat and pants are optional)
  • Hat that covers ears (e.g. balaclava) or hat with earmuffs
  • Insulated gloves (2 pairs in case one gets wet or lost), waterproof or water resistant
  • Heavy jacket or parka, waterproof or water resistant
  • Socks, 4 pairs, non-cotton; wool or smart wool worn over sock liners
  • Sock liners, 2 pair (silk and/or polypropylene) (wear under wool outer socks)
  • Thermal Underwear, 2 pairs, non-cotton
  • Waterproof boots or rubber overshoes (required)
  • Long sleeve turtle neck shirts, non-cotton
  • Heavy sweater or sweatshirt
  • Pants, 2 pairs, non-cotton (ski clothing works great here)
  • Sleepwear (jogging suit or similar, stocking cap)
  • Poncho or other raingear
  • Personal wash kit (washcloth, soap, toothbrush, toothpaste, comb)
  • Water bottle or canteen
  • Mess kit and silverware
  • Daypack to carry stuff in during the competition
  • Sleeping bag (rated 5 degrees or less), or 2 sleeping bags can be used one inside the other.
  • Sleeping bag liner or a wool or fleece blanket can be used inside the sleeping bag
  • Ground pad or other closed cell insulator (required)
  • Boy Scout Handbook for those on the Trail to First Class
  • Flashlight with working batteries, extra batteries, spare bulbs

Optional Gear

  • Watch
  • Compass and whistle
  • Matches (preferably in waterproof container) IF boy has Fireman’s Chit
  • Pillowcase-optional (can be stuffed with clothing to make pillow)
  • Personal first aid kid
  • Chap stick and/or lotion
  • Sun screen


Electronics Merit Badge


Electronics is the science that controls the behavior of electrons so that some type of useful function is performed. Today, electronics is a fast-changing and exciting field.

Requirements

  1. Describe the safety precautions you must exercise when using, building, altering, or repairing electronic devices.
  2. Do the following:
    1. Draw a simple schematic diagram. It must show resistors, capacitors, and transistors or integrated circuits. Use the correct symbols. Label all parts.
    2. Tell the purpose of each part.
  3. Do the following:
    1. Show the right way to solder and desolder.
    2. Show how to avoid heat damage to electronic components.
    3. Tell about the function of a printed circuit board. Tell what precautions should be observed when soldering printed circuit boards.
  4. Discuss each of the following with your merit badge counselor, and then choose ONE of the following and build a circuit to show the techniques used:
    1. Tell how you can use electronics for a control purpose, and then build a control device circuit.
    2. Tell about the basic principles of digital techniques, and then build a digital circuit. Show how to change three decimal numbers into binary numbers and three binary numbers into decimal numbers.
    3. Tell about three audio applications of electronics, and then build an audio circuit.
Show how to read the schematic diagram of the project you chose and, to the best of your ability, explain to your counselor how the circuit you built operates.

  1. Do the following:
    1. Show how to solve a simple problem involving current, voltage, and resistance using Ohm’s law.
    2. Tell about the need for and the use of test equipment in electronics. Name three types of test equipment. Tell how they operate.
  2. Find out about three career opportunities in electronics that interest you. Discuss with and explain to your counselor what training and education are needed for each position.

Resources

November 13, 2016

Cardboard Campout


Cardboard Campout
(Fort Building)

We have an annual Cardboard Campout (Fort Building). This will be our pre-winter campout. We will be building forts out of cardboard and sleeping in them. We will be teaching the boys how to winter camp in a safe, easy to abandon, environment. It will be cold, so please read the "what to bring carefully". We may even qualify for a couple of Frost Points.

What to Bring:
  • Winter sleeping bag (rated at 15 degrees or below) or multiple sleeping bags (nested together) 
    • Sleeping bags need to be rated for much lower than what the temperatures will be. 
  • Extra Blankets (for above and below sleeping bag) for extra insulation 
  • Thick pad to sleep on (thicker is better), 2 pads would be preferred 
    • note: air mattresses are terrible for winter camping 
  • Change of clothing, including clean underwear and socks, to sleep in (critical!) 
  • Flannel pants, sweatshirt, and winter hat (beanie) to sleep in 
  • Hand/toe warmers (optional) (10+ hours - anything less than 8 hour is useless for overnight) 


October 15, 2016

Adventures are just tales


"Adventures are just tales of someone else being miserable far far away."
-- B. V. Larson (Star Force Series)


October 11, 2016

Summit Games


SUMMIT GAMES 2016

The premier planning and training activity for our young men.

All boys: please wear your uniform (class A preferred) and bring the dates of any scheduled family activities for the coming year, so we can plan around them.


January 26, 2016

Cardboard Campout


Cardboard Campout
(Fort Building)

We are going to be having a Cardboard Campout (Fort Building).  This will be our pre-winter campout.  The Scouts will be building forts out of cardboard and sleeping in them.  We will be teaching the boys how to winter camp in a safe, easy to abandon, environment.  It will be cold, so please read the "what to bring carefully".  We may even qualify for a couple of Frost Points.  For dinner the scouts will be eating cooking hotdogs and dutch-oven.

We are in need of extra donations of cardboard and duct tape.

What to Bring:
  • Cardboard box (large appliance size, refrigerator size boxes work best)
  • Duct tape (lots of duct tape)
  • Tarps (if you can)
  • Winter sleeping bag (rated at 15 degrees or below) or multiple sleeping bags (nested together)
  • Blankets (for above and below sleeping bag)
  • Thick pad to sleep on (thicker is better), 2 pads would be preferred
    • note: air mattresses are terrible for winter camping
  • Change of clothing, including underwear and socks, to sleep in (critical!)
  • Flannel pants and sweatshirt (with hood or winter hat) to sleep in
  • Hand warmers (10+ hours - anything less than 8 hour is useless for overnight)


    Every Kid in a Park

    Announcing Every Kid in a Park

    A new initiative to get all 4th graders and their families to experience the places that are home to our country’s natural treasures, rich history, and vibrant culture FREE OF CHARGE! 

    ABOUT EVERY KID IN A PARK


    Did you know that you own millions of acres of national parks, historic structures, cultural artifacts, ancient forests, snow-capped mountains, and clear blue lakes? Our public lands and waters belong to all Americans and are waiting for you to explore them!

    To help engage and create our next generation of park visitors, supporters and advocates, we are kicking off the Every Kid in a Park initiative. The immediate goal is to provide an opportunity for each and every 4th grade student across the country to experience their public lands and waters in person throughout the 2015-2016 school year.

    Beginning September 1st all kids in the fourth grade have access to their own Every Kid in a Park pass. This pass provides free access to national parks, national forests, national wildlife refuges, and more!

    The Every Kid in a Park pass is good for the 2015-2016 school year, until August 31, 2016. Information on obtaining the pass is available by clicking here.

    Every Kid in a Park joins the Foundation's Open Outdoors for Kids program in helping children learn history, culture, and science while exploring the great outdoors. The initiative is an administration-wide effort among the National Park Service, Forest Service, Department of Education, Army Corps of Engineers, Bureau of Land Management, Fish and Wildlife Service, Bureau of Reclamation, and National Oceanic and Atmospheric Administration.

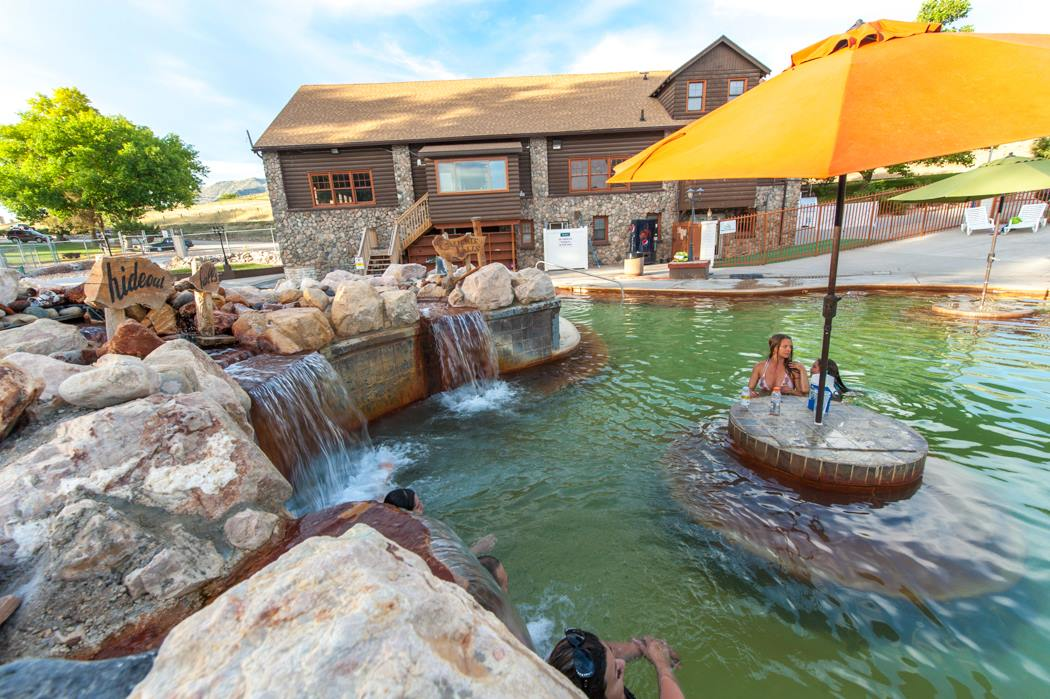
    Crystal Hot Springs

    Crystal Hot Springs
    Boy Scouts:

    Fire & Ice Campout to Crystal Hot Springs.

    As a reminder, the Crystal Hot Springs (pool and water slides) has a $10 entrance fee per boy, which includes the pool, slides and camping.

    We will be camping in the snow, so please remember to pack for winter camping.

    Please read the A Parent’s Guide To Winter Camping.

    Fire & Ice Campout

    A Parent’s Guide To Winter Camping


    A Parent’s Guide To Winter Camping
    author unknown

    Winter camping is one of the most advanced and challenging of outdoor adventures. It will take your son into a magnificent frozen wilderness sparkling with snow and ice. Temperatures are cold, and the usual watering holes, campgrounds, and trails of summer are buried beneath drifts. On still nights a fragile, magical beauty blankets the land beneath the dance of the stars, and when the weather turns bad, howling winds and driving snow make a familiar meadow seem awesome and alien as any arctic landscape. Living under such strange and demanding conditions requires skill, experience, and the proper equipment, "...but if ye are prepared ye shall not fear" (D&C 38:30).

    Some common misconceptions

    Leather hiking boots will keep your feet warm.
    FALSE! The snug fit of most hiking boots can limit the circulation of blood in the feet especially if you're wearing extra layers of socks. Mukluks, booties, and over boots with enough room to hold your foot and plenty of insulation and still allow moisture to escape are much more effective.

    Waterproof clothing is ideal for cold-weather camping.
    FALSE! To keep you warm, your clothing must allow body moisture to escape. Moisture trapped close to the body wicks away heat through conduction and evaporation. Waterproof clothing is preferable only in wet rainy weather.

    Sugary and starchy foods provide sufficient cold-weather a energy.
    FALSE! Sugar and starch burn too quickly to keep you warm hour after hour. Foods high in fat, complex carbohydrates, and protein release energy more slowly.

    Drinking liquids is not important on winter treks.
    FALSE! Cold air is very dry, and it draws moisture out of your body each time you breathe. Winter temperatures may trick you into believing you're not thirsty, even though your body needs plenty of fluids to ward off the dehydration that can upset your metabolism and increase your susceptibility to hypothermia.

    The worst enemy of a winter camper is moisture! Wet clothing can steal body heat up to 25 times faster than when dry. You must stay dry to stay warm. There are three main ways that clothing and gear become wet.
    1.  Rain, sleet or water on the ground (puddles, rivers, etc.): Gear can be protected from rain and ground water by sealing extra clothing, sleeping bags, etc. inside plastic bags. A Scout can protect himself from falling rain or melting snow by wearing a waterproof poncho.
    2. Snow-covered clothing or gear becomes warm, melting the snow: Packs taken from the warmth of a van and placed in the snow can quickly become waterlogged.  Again, to prevent the pack contents from getting wet seal items inside waterproof bags. Also, bring a foam mat or cushion to sit on so you don't sit directly on the snow. Not only will the snow extract heat from your rear end, the snow can melt causing your pants to get wet.
    3. Perspiration and sweat: Body perspiration and sweat can soak your clothing just as effectively as a rain shower. You can guard against this by using the layering principle (described below), by not wearing waterproof outer garments (unless it is raining), and by allowing body moisture to escape.


    The Layering Principle
    The essence of staying warm in the winter is having the proper clothing layers and knowing how to use them effectively. The thermal insulation of clothing is proportional to the thickness of the dead air space enclosed. The clothing is not what is keeping you warm, it is the dead air. The key to providing this dead air space is through having a number of layers of clothing. This allows you to add or shed layers to increase (or decrease) your accumulated dead air space as the temperature changes and/or as your activity level changes.  Why not just have lots of layers on and sweat? Remember, heat loss from a wet surface can be up to 25 times greater than a dry surface. If you sweat and get soaked, you will lose heat much more quickly through evaporation of the water. So, you want to control your layers to be warm at your current activity level without sweating.

    Clothing Materials
    1. Wool - as much as 60-80% of wool cloth can be air.  Even with water in the fabric, wool still retains dead air space and will still insulate you. Wool is relatively inexpensive (if purchased at surplus stores). However, it can be itchy against the skin and some people are allergic to it.
    2. Polypropylene and other synthetics - these are plastic fibers which offer dead air space and cannot absorb water. The fibers are hydrophobic meaning they move water vapor away from the body Synthetic fibers are extremely effective when worn directly against the skin to keep the skin from getting wet and to reduce evaporative heat loss. Synthetic fibers (such as Polarguard, Hollofil, Quallofil, and Thinsulate) are often used in sleeping bags, parkas, and mittens. Tightly woven nylon is an excellent outer material, providing good wind resistance while still allowing water vapor to pass through.
    3. Cotton - is not as good an insulator as wool or polypropylene. Cotton fibers are very absorbent and can soak up lots of water. Wet cotton clothing can be much worse than having no clothing at all! For this reason, jeans, T-shirts, and other 100% cotton clothing should be avoided, or at least waterproofed with wax or silicone sprays.
    4. Down - feathers are a very efficient insulator. They provide excellent dead air space with little weight. The major problem with down is that it absorbs water.  The wet feathers tend to clump and lose their dead air space.


    Body Clothing
    1. Head - because a person can lose 50-70% of heat from their head, a good hat is essential in winter camping. The adage - if your toes are cold, put on a hat - is true. Wear a warm wool stocking cap over your head and ears. If your parka has a hood, that will help insulate your head and neck as well. You can also wear a scarf or a ski mask if additional insulation is required.
    2. Hands - mittens are warmer than gloves. It is useful to have an inner mitten with an outer shell to give you layering capabilities. Also, "idiot strings" are important to keep you from losing mittens in the snow. However, gloves are also essential in winter for dexterity, like pitching a tent or tying your boots. Since gloves and mittens tend to get wet, waterproof them and bring several pair.
    3. Socks - one of the best systems for keeping feet warm is using multiple layers. Start with a thin polypropylene (or other synthetic) sock next to the skin to wick moisture away, followed by 1-2 pair of wool or wool/synthetic blend socks. If they are too tight, they will constrict circulation and increase the chance of frostbite.
    4. Footwear - Because of their direct contact with the ground and snow, feet can get cold very easily.  There are several types of boots that are suitable for winter camping, including:
      1. Insulated Boots - such as Sorel or "Mickey Mouse" boots. These are rubber or leather and rubber boots that use a layer of wool felt to provide dead air space. These boots are often rated from -20 to -40 degrees.
      2. Pac Boots - plastic shell pac boots (or mountaineering boots) use inner boots made with wool felt or a closed-cell foam insulation. These can be very warm.
      3. Mukluks - one piece moccasins which reach to the knee. They are used with felt liners and wool socks. The Mukluk itself serves as a high gaiter. Mukluks are very comfortable, but they're not waterproof so they are best used in cold, dry settings where water and rain aren't a problem.
      4. Leather Boots - can be somewhat effective when used in conjunction with an insulated overboot. They need to be much larger than normal to accommodate several layers of wool socks.  Additional insulation can be added to boots by wrapping them in foam rubber or carpet pad and covering them in plastic. The foam and plastic can be tied in place using rope or string.
      5. Gaiters - are essential for winter activity. Gaiters are waterproof or water-resistant sleeves that extend from your boot to your knee. They keep snow from getting into your boots and keep your socks and pant legs free from snow. Gaiters can be made using a plastic or nylon material and string.
      6. Insulated Booties - these are booties insulated with a synthetic fill and typically have a foam sole. They are very nice to wear in your sleeping bag at night.
    5. Outer Layer - it is essential to have an outer layer  that is wind proof and water resistant. It also needs to be able to be ventilated. If a garment is waterproof, it cannot breathe (except for very expensive high-tech materials such as Gore-Tex). A coat or jacket with an attached hood is also helpful. One of the best approaches is to wear an outer shell that can breathe and add a loose fitting waterproof layer such as a poncho when there is rain or sleet. Your outer layer can be a ski parka, coat, or jacket as long as it will block the wind. It doesn't need to be extremely warm if you have enough layers underneath it.

    An example of layering
    Start with thermal underwear that are not too tight. Add a flannel shirt, wool trousers, and a wool turtleneck sweater.  Wear polypropylene socks followed by 1-2 pair of wool or wool/synthetic-blend socks. Add a jacket, wool cap, and heavy boots followed by gaiters. Wear wool mittens or gloves with water repellent shells over them. Add a scarf, parka with a hood, and water-repellent snow pants if needed. Keep layers loose. And remember... don't wear waterproof clothing unless it is raining.

    This is just one possible layering scheme. You can substitute available clothing for the different layers, provided that they are appropriate for cold-weather camping (e.g. not waterproof or 100% cotton). If you have ski bibs, for example, you could use them in place of the wool trousers.


    Sleeping Bags
    Sleeping bags for winter camping should be rated to a temperatures lower than what you will likely experience if you want to be comfortable. There are a variety of different fills for sleeping bags: down, Primaloft, Microloft, Qualofill, Polarguard, etc. (Dry down is warmer than synthetic fibers, but down is a poor insulator when wet and it takes longer to dry than synthetic fibers.) Ideally, the bag should be a mummy bag with a hood. A mummy bag concentrates the insulation around your body without leaving large spaces for convection currents. You can augment your sleeping bag if it isn't as warm as necessary. There are several ways to do this.
    1. Put your bag inside of another sleeping bag. Remember that you are trying to trap as much dead air as possible. It won't help much if the outer bag compresses the dead air out of the inner bag. When you insert the inner bag, put the zipper on the side opposite the outer zipper, if possible. Adding a summer bag over your mummy bag can add 15-20 degrees.
    2. Add a wool blanket inside your sleeping bag (adds 5-10 degrees). Fold the blanket in half and safety pin the edges to form a pocket.
    3. Put your sleeping bag inside of a bivy sack (adds 5-10 degrees). A bivy sack is an outer shell that you slip your sleeping bag into.
    4. Add a vapor barrier liner (adds 5-10 degrees).
    5. Put a foam pad on top of your sleeping bag, securing it with straps or ties.

    Foam Sleeping Pads
    You need to insulate your sleeping bag from the underlying snow. Closed-cell foam pads or self inflating pads (like Therm-A-Rest) work well. Open-cell foam can be used, but only if it is covered by a plastic sheet to keep it from absorbing water. Your insulation should be at least 2 inch thick (two summer pads work well). Avoid cots and air mattresses. They allow convection currents to develop, which significantly increase your heat loss.

    Sleeping Tips
    • Do wear a stocking cap or ski mask to bed.
    • Do fluff up your sleeping bag before getting in to trap as much dead air as possible.
    • Do bring your water bottle with you inside your bag. It will keep it from freezing and it will be available if you need a drink. Caution: Don't let it leak! [Hint: seal it in a zip-lock bag.)
    • Do loosen your boot laces and put your boots between your pad and sleeping bag to keep them from freezing. It is almost impossible to put on frozen boots.
    • Do eat high-protein snacks before bed and during the night, if needed. Foods such as cheese, nuts, and jerky make good nighttime snacks.
    • Do tighten the drawstring around your head and neck to prevent cold air from entering your bag.
    • Do check on your buddy during the night to make sure that he is okay.
    • Don't wear any clothing to bed that is damp or which was worn during the day. Bring dry sweats, a wool cap, and extra wool socks or insulated booties to sleep in.
    • Don't breathe inside your sleeping bag. Your breath will get your sleeping bag wet.